
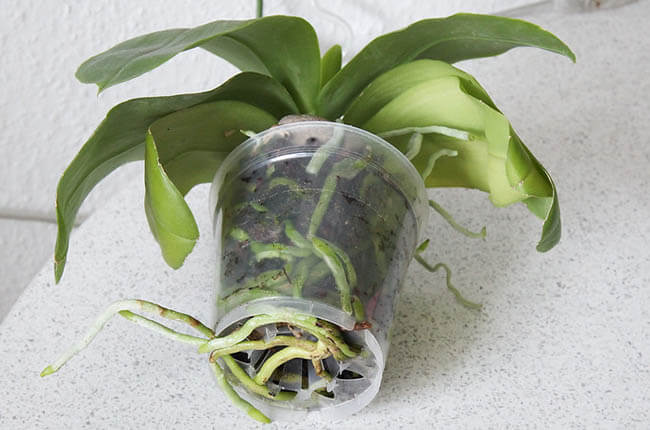
If you have not repotted your orchid for over two years, chances are your orchid is “root-bound” or “pot-bound”, with a lot of roots packed inside the pot and growing out of the pot through the drainage hole and the ventilation slits on the side.
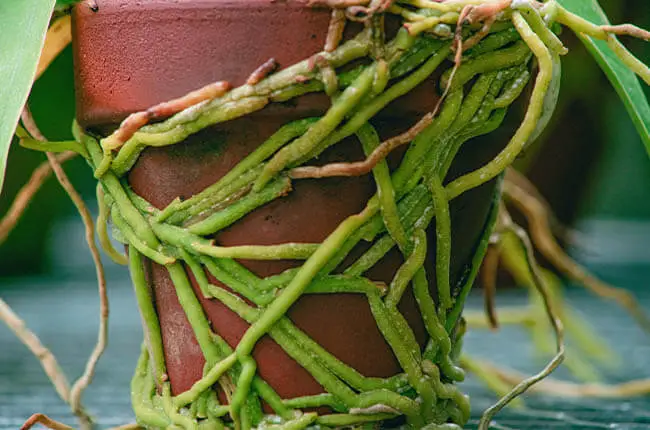
If you grow your orchids in terracotta pots, you may also find roots firmly attached to the clay walls.
This article shows you when you should repot an orchid with overgrown roots, how you can repot it without causing any root damage and how to choose the right pot size.
1. Do orchids like to be root-bound?
First off, orchids do not mind their roots in a crowded space.
Orchid roots actually like to fit snugly inside a pot where the velamen, a thin silvery-green covering on the roots, like to attach to a surface, just like attaching to a tree branch in nature, for stability and for absorbing moisture and nutrients.
That’s why orchid roots often become stuck to porous, water-retentive surfaces, e.g. clay pot walls, bark, rocks.
2. When should you repot overgrown orchids?
Being root-bound does not necessarily mean that an orchid needs to be repotted.
In fact, it is common for orchid roots to grow out of the drainage holes and should not trigger an immediate repot. A root-bound orchid is often healthy and sometimes even sending out spikes.
Given the high volume of roots, a root-bound orchid will thus need to be watered more frequently.
There are a few signs you watch out for. You should repot an orchid:
- When the growing media has broken down because a broken down media is acidifying which is an unhealthy environment to the roots as they can rot easily under a low pH. Also, there will be no growing media to retain moisture around the roots and the many roots inside the pot will be competing for moisture. A bareroot orchid without media needs to be watered more frequently than one with media.
- When it has stopped growing even though it should during the growing season in spring and summer. Stagnated growth is a sign that the orchid is under stress and is focusing its energy on somewhere else other than growth.
- When the leaves lose their shine and become droopy and dehydrated. This is usually an early sign of root rot or some root problems making them lose the ability to absorb water and nutrients.
The general rule of thumb is to repot every 2 years for organic media (i.e. moss, bark).
For inorganic media that does not break down easily, there is really no need to repot every two years. This is because uprooting and repotting an orchid is a stressful experience for the plant and would set it back in its growth.
3. How to repot orchids with overgrown roots?
Usually, repotting a root-bound orchid will not only require changing the media, but also moving it to a pot of a different size (not necessarily bigger, more on this later) to accommodate the root mass.
Step 1: Long soak
First, soak the whole pot (only the roots) for 30 minutes. A long soak in water makes the roots plump, more flexible and thus easier to bend without breaking during repotting. Be careful of not leaving any pool of water on the leaves or in the leaf joints.
Step 2: Remove loose media
Use your fingers or even tweezers to loosen up and remove the media between the roots. You can dig your fingers into the media to loosen it up or you can turn the pot upside down to shake off any loose media.
Step 3: Gently detach roots from the pot
For roots that are stuck to the walls of the pot (which happens for clay pots), use your thumb to apply pressure on the roots and gently push them to the side. You will feel a small pop as the roots get detached from the pot.
For roots that have grown out of the holes on the bottom and the sides, try to bend or tease them out of the holes. If not possible, you can trim off the protruded parts with clean, sterilized cutters. Trimming a few roots should not set the plant back given the tremendous amount of roots it has.
You may also consider using a hammer or scissors to break or cut open the pot to remove the plant.
Step 4: Clean and replace with fresh media
Continue to use your fingers to loosen up and remove the remaining media between the roots.
Rinse the roots under water to wash off the small bits of media attached to the roots.
Step 5: Repot in a properly sized pot with fresh media
Find a pot size that is appropriate to the root mass. Repot the orchid with fresh media.
Instead of using moss and bark, consider switching to inorganic media (e.g. LECA, pumice, lava rocks) which does not require frequent repotting because it does not break down.
4. Choosing the right pot size for orchids
Orchids like to fit snugly to the pot so the selection of pot size should be in relation to the root mass, rather than to the amount of foliage.
When repotting an orchid, the new pot should allow for two years of growth.
Using a pot that is too large would hold too much media and thus increase the chances of retaining too much water for too long and subsequently a higher chance of root rot.
For Phalaenopsis, 95% of them can be potted in 4-inch or 6-inch pots.
If the orchid has lost its root mass, repot in a smaller pot that can snugly fit the roots.
If the orchid’s root mass is too big for a 4-inch pot but too small for a 6-inch pot, go for a 6-inch pot with non- water-retentive Styrofoam peanuts to compensate for the extra space.
Conclusion
To sum up, orchids like to be a bit pot-bound.
It is completely normal for a few roots poking out the drainage holes in the bottom and on the side. If the roots appear out of control but the plant is healthy with vibrant new growths, it is better to refrain from repotting it in order to not stress it.
Repot only when the media has broken down or when there seems to be some health issues.
To do so, you can give the entire pot a long soak before carefully detaching individual roots that are stuck to the pot, or teasing the roots out of the pot. If all else fails, you can break or cut open the pot and repot in a new pot with fresh media.
Happy growing!
Related articles
Why Does My Orchid Have So Many Air Roots? (Myth Busted!)
How to Promote Orchid Root Growth? (Easier than you think)
Saving A Rootless Orchid? (3 ICU Setups You Should Know)
Photo credits
Featured picture by Timothy Dykes on Unsplash

- Top 6 Drip Irrigation Systems for Raised Beds (2025) - January 31, 2025
- Top 10 Orchid Fertilizers: A Comprehensive Review (2025) - January 16, 2025
- Top 6 Slow-Release Fertilizers for Houseplants & Veggies (2025) - January 15, 2025