
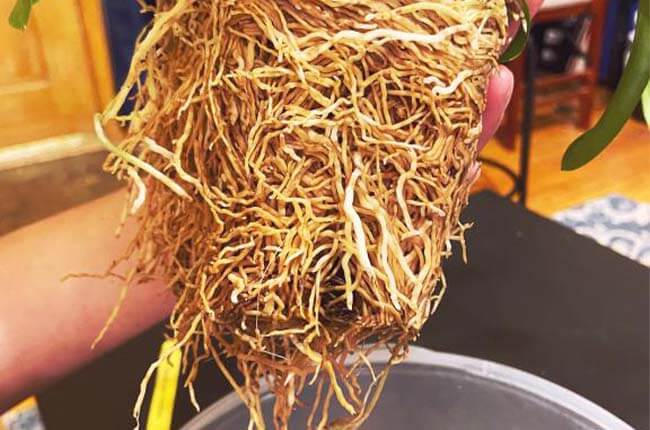
Repotting oncidiums can be daunting because they often become root bound when their thin, fragile roots become so tightly packed that they become impossible to separate.
A root-bound oncidium isn’t necessarily an immediate concern if the plant is still flowering and not showing any signs of ill health. However, the longer you wait, the more you risk your plant suffering from being in a pot that it’s outgrown.
Read on to learn about what to do with a root-bound oncidium and how to repot it without damage.
8 Steps to repot a root-bound Oncidium
The best solution for a root-bound orchid is repotting your oncidium to a larger pot with fresh medium, as tightly packed orchids can indicate that your oncidium orchid has outgrown its current pot.
Oncidium orchids have notoriously complex root systems, so keep this in mind when preparing to repot.
Step 1: Sterilize cutting instruments
This is best done before you begin the repotting process, as it can be easy to lose track of sanitizing your instruments once you have the orchid out of its pot.
Simply wipe down your cutting shears or scissors with rubbing alcohol before use. This practice helps keep your orchid from being contaminated, especially if you’ve used the same cutting instruments to treat diseased orchids.
Step 2: Pre-soak the pot
Before repotting, submerge the entire pot with the roots in water for a minute. This can help loosen up the substates, making it easier to separate the roots and the substrate later on.
However, if there is a lot of coco coir in the medium, you may not need to pre-soak the orchid because they crumble easily and may get messy as they float on the water.
Step 3: Remove plant from pot
Be careful when doing this, as root-bound orchids are tight and easily breakable.
For plastic containers that are flexible, gently squeeze or massage it to loosen up the roots inside before pulling. You can even cut into the plastic pot to help you remove the orchid.
Grasp the base of the plant and twist, taking great care to be gentle, as oncidium roots are slender and easy to break. This can be hard with root-bound orchids, as sometimes the roots can be anchored to the pot through drainage holes or the rim.
But don’t worry if you break a few roots in the process which would not hurt the plant.
Step 4: Loosen roots and remove media
The tighter the roots, the more difficult it is to ease them loose.
Lay the orchid sideways on a flat surface and massage the roots loose while removing the medium.
Remove any dead flower spikes and dead roots which are mushy, brown, and break apart easily, leaving behind a stringy white pith.
Stringy roots are not viable in absorbing water and nutrients and will not grow into new roots. You can leave them behind to help anchor the plant in the medium, or you can remove them with sterilized cutters.
Step 5: Prepare a bigger pot
A root-bound oncidium is one that’s outgrown its current pot.
Do not use a pot that is too big because it would hold onto too much moisture, making it more prone to root rot. Choose only one size larger than the current pot.
Step 6: Use new media
Cushion the crown by placing media under it before adding media to the sides.
Use new growing media especially if the old ones have been broken down.
The best medium for oncidiums is a mix of a water-retentive medium such as sphagnum moss together with a slightly chunky substrate such as small-sized bark to allow ventilation around the roots.
Packing the medium around the roots before placing the orchid in the new pot keeps the roots from becoming suffocated and tangled.
Step 7: Place plant inside new pot
After adding some medium to the bottom of the new pot for cushion, you’re ready to add your orchid to its new home. Gently add the plant to the pot and distribute the medium evenly around the roots.
Alternatively, you can add the orchid to the pot before adding the medium.
Step 8: Water the plant
Water your orchid after repotting.
Should you remove the old medium when repotting?
When repotting, you should replace the old medium, since the medium can degrade and decompose over time. If some medium is stuck inside the roots, especially those at the center, it’s okay to use a skewer or chopstick to loosen them free – just be careful not to damage the healthy roots.
Should you trim healthy orchid roots when repotting?
Trimming healthy orchid roots isn’t necessary when repotting and can actually damage the plant.
When should you repot oncidiums?
There are three main indicators that tell you it’s time to repot your oncidium.
Pot is too small
Orchids will eventually outgrow their pots, which is the main reason they become root bound.
Tightly packed orchid roots are a clear sign that your plant has outgrown the pot, but other signs include many air roots that are growing out of the pot, as this means the roots have run out of room to grow and are looking for whatever way out they can find.
Potting media loses nutrients
Eventually, potting media will go bad, having lost its nutritional value to the orchid. When the medium breaks down, it becomes tightly packed, preventing air to go around the roots and suffocating the roots.
Depending on the size of the potting media, it can take between one or two years for it to go bad.
Other factors such as overwatering, poor drainage, and disease can cause your potting media to break down more quickly, so you should repot if you experience any of these problems. You can tell your potting media has broken down if you notice a foul, musty odor.
Tangled roots
Sometimes orchid roots will become knotted and tangled when they don’t have enough space inside the pot to grow. Tangled roots is not a problem until you need to change the old media. So, it is a good idea to prevent roots from getting tangled.
Related
Orchid Roots Stuck to Pot? (How to Repot Without Damage)
Why My Orchid Has So Many Air Roots (What to Do?)
Oncidium with Wrinkled Bulbs: Causes & Solutions
Fir vs Pine Bark: 8 Key Differences for Potting

- Top 6 Drip Irrigation Systems for Raised Beds (2025) - January 31, 2025
- Top 10 Orchid Fertilizers: A Comprehensive Review (2025) - January 16, 2025
- Top 6 Slow-Release Fertilizers for Houseplants & Veggies (2025) - January 15, 2025